
I'll make this brief. Lightroom kicks butt in workflow, but it sucks are not allowing me to do what I like to do in Photoshop. It's driving me bonkers trying to learn this program.
Only good came come of this, but when you're ripping your hair out, that's a hard one to believe.
Anyhow, I am slowly working on my next entry, however I'm coming up a bit short on the topic I want to talk about... we'll see how this works out. I set a goal of 10 entries, and i have 3 so far. (It's a 10 best list)
At least, for now, while i have a bit of writer's block, i can revisit my last post and fix the error that Storpotaten pointed out.
Stay Tuned
Wednesday, December 16, 2009
Monday, December 14, 2009
Cross-Platform... Adapting to old lenses...
In the digital age, one cannot resist the ability to do more with their camera. I know I can't.
Having said that, there are many individuals out there that have taken to adapting or using adapters for their own lenses. In some rare cases, the camera's have been adapted to take older lenses. The advantage of adapting is that you are able to re-purpose your old film lenses. The disadvantage is, not all lenses are adaptable - but there's two sides to that unfortunate coin.
One is that, the register distance is quite different. The other is, the image circle is different.
Now, there are some cases, where a smaller lens can be adapted to a larger mount, but the results aren't always inspiring. This is the rarer of the two cases unfortunately. The more common problem in cross-platforming is the register issue.
Now, many mechanical adapters are out there, ready to allow you to mount Lens A to Camera B. For the most part, the more successful cross-platform matings belong to Canon, Nikon, Leica, Olympus and Pentax. I don't really know much about the other brands, but from what I understand, Nikon's and Olympus's are generally the other favourites. Leica cameras are often hideously expensive, so anyone wanting to adapt something to that kind of camera, most likely has the money to do so. :P
As for Canon... Canon has a register distance of 44mm, which is pretty short by modern standards, however, it is still longer than older standards. This means that, if you want to mount an older lens on a Canon, you're going to lose infinity focus. Alternatively, if you use a lens that's native to a longer register, you end up winning in infinity focus, but probably lose in minimum focus. No one really talks about that, so I'm only speculating on that. (stands to reason, right?)
Additionally to the shorter register, is the fact/possibility that older lenses will extend into the body, thus introducing the possibility of damaging your mirror.
There are examples of adapters for those kinds of lenses that maintain infinity focus and prevent mirror damage, but there is a cost... Image Quality. These kinds of adapters introduce (diopter) glass that acts as a weak teleconverter. In quite a few cases, I've read that 2/3rds of a stop are lost - sometimes more. No matter how good that lens is, losing that much is generally considered not worth the investment. Plus, the quality of said glass may be poor, so it ends up being money flushed down the toilet.
Bob Atkins created a nice little table with the different types of lenses out there that can and cannot be adapted to EOS mount. However, I felt that it fell short given the wide range of available lenses out there. (please note: i didn't say a wide range of awesome lenses)
Please note: the availability of adapters isn't exactly solid across the range. Some may need hunting.
If you're a lucky soul that has an older lens that has amazing optics, but is one of those listed as not having the ability to be adapted, don't despair. There are talented individuals out there that can modify the mount of your lens so you can continue using the lens on your dSLR. The more commonly modified/updated lenses tend to be Canon FD's, because there were many amazing lenses made back in the day.
Now... the Cavaet!
Some lenses, while they can be used with an adapter, they cannot be used on Full Frame cameras. They can only be used on crop cameras (EF-S mount [rebel series and xxD]). Always check to make sure that the lens in question is compatible in this way.
Having said that, there are many individuals out there that have taken to adapting or using adapters for their own lenses. In some rare cases, the camera's have been adapted to take older lenses. The advantage of adapting is that you are able to re-purpose your old film lenses. The disadvantage is, not all lenses are adaptable - but there's two sides to that unfortunate coin.
One is that, the register distance is quite different. The other is, the image circle is different.
Now, there are some cases, where a smaller lens can be adapted to a larger mount, but the results aren't always inspiring. This is the rarer of the two cases unfortunately. The more common problem in cross-platforming is the register issue.
Now, many mechanical adapters are out there, ready to allow you to mount Lens A to Camera B. For the most part, the more successful cross-platform matings belong to Canon, Nikon, Leica, Olympus and Pentax. I don't really know much about the other brands, but from what I understand, Nikon's and Olympus's are generally the other favourites. Leica cameras are often hideously expensive, so anyone wanting to adapt something to that kind of camera, most likely has the money to do so. :P
As for Canon... Canon has a register distance of 44mm, which is pretty short by modern standards, however, it is still longer than older standards. This means that, if you want to mount an older lens on a Canon, you're going to lose infinity focus. Alternatively, if you use a lens that's native to a longer register, you end up winning in infinity focus, but probably lose in minimum focus. No one really talks about that, so I'm only speculating on that. (stands to reason, right?)
Additionally to the shorter register, is the fact/possibility that older lenses will extend into the body, thus introducing the possibility of damaging your mirror.
There are examples of adapters for those kinds of lenses that maintain infinity focus and prevent mirror damage, but there is a cost... Image Quality. These kinds of adapters introduce (diopter) glass that acts as a weak teleconverter. In quite a few cases, I've read that 2/3rds of a stop are lost - sometimes more. No matter how good that lens is, losing that much is generally considered not worth the investment. Plus, the quality of said glass may be poor, so it ends up being money flushed down the toilet.
Bob Atkins created a nice little table with the different types of lenses out there that can and cannot be adapted to EOS mount. However, I felt that it fell short given the wide range of available lenses out there. (please note: i didn't say a wide range of awesome lenses)
| CANON EOS | 44.0mm | CAMERA WE'RE MOUNTING THESE LENSES TO | ||||
| BODY | REGISTER | NOTE | BODY | REGISTER | NOTE | |
| CONTAREX | 46.0mm | ADAPTABLE | CANON SCREW (M39) | 28.8mm | NAWM | |
| LEICA R | 47.0mm | ADAPTABLE | CANON FD | 42.0mm | NAWM | |
| NIKON | 46.5mm | ADAPTABLE | FUJICA X | 43.5mm | NAWM | |
| OLYMPUS OM | 45.5mm | ADAPTABLE | KONICA F | 40.5mm | NAWM | |
| PENTAX K | 45.5mm | ADAPTABLE | MINOLTA MD | 43.5mm | NAWM | |
| PENTAX M42 | 45.5mm | ADAPTABLE | MINOLTA SR | 43.5mm | NAWM | |
| YASHICA YUS/DSB | 45.5mm | ADAPTABLE | MIRANDA | 41.5mm | NAWM | |
| CONTAX/YASHICA | 45.5mm | ADAPTABLE | KONICA HEXAR | 28.0mm | UNKNOWN | |
| CONTAX RTS | 45.5mm | ADAPTABLE | LEICA SCREW (M39) | 28.8mm | NAWM | |
| PRAKTICA / HANIMEX | 44.4mm | ADAPTABLE | OLYMPUS PEN F | 28.95mm | NAWM | |
| K-mount | 45.46mm | ADAPTABLE | HASSELBLAD XPAN | 34.3mm | UNKNOWN | |
| M42 Screw | 45.46mm | ADAPTABLE | CONTAX RF | 34.85mm | UNKNOWN | |
| Olympus OM | 46.0mm | ADAPTABLE | NIKON RF | 34.85mm | UNKNOWN | |
| Arriflex | 52.0mm | ADAPTABLE | CANON R/FL/FD | 42.0mm | UNKNOWN | |
| Mamiya 645 | 63.3mm | ADAPTABLE | PAXETTE | 44.0mm | UNKNOWN | |
| Pentax 645 | 70.8mm | ADAPTABLE | SONY ALPHA | 44.6mm | PA | |
| Kiev 60/Kiev Six | 74.1mm | ADAPTABLE | Nikon F | 46.5mm | ADAPTABLE | |
| Hasselblad/Kiev88 | 82.1mm | ADAPTABLE | Contax N | 48.0mm | UNKNOWN | |
| T2 MOUNT | 55.0mm | ADAPTABLE | Mamiya RZ | 105mm | UNKNOWN | |
| RICOH BAYONET | 45.5mm | ADAPTABLE | Mamiya RB | 112mm | UNKNOWN | |
| PETRI BAYONET | 45.5mm | ADAPTABLE | ||||
| Legend: | NAWM | NEEDS ADAPTER WITH MULTIPLIER | ||||
| PA | POSSIBLY ADAPTABLE | |||||
Please note: the availability of adapters isn't exactly solid across the range. Some may need hunting.
If you're a lucky soul that has an older lens that has amazing optics, but is one of those listed as not having the ability to be adapted, don't despair. There are talented individuals out there that can modify the mount of your lens so you can continue using the lens on your dSLR. The more commonly modified/updated lenses tend to be Canon FD's, because there were many amazing lenses made back in the day.
Now... the Cavaet!
Some lenses, while they can be used with an adapter, they cannot be used on Full Frame cameras. They can only be used on crop cameras (EF-S mount [rebel series and xxD]). Always check to make sure that the lens in question is compatible in this way.
Sunday, December 13, 2009
DIY Tilt-Shift
Okay, first off... this post is not about how to make yourself your own Tilt-Shift. For lack of better words, this a commentary on how to make a tilt-shit lens. Seriously... It amazes me how many people out there, with a wealth of photographic knowledge can't get this simple concept right. Many confuse Selective Focus for Perspective Control - which, really annoys me.
This... is NOT a tilt-shift lens. (i'll explain below why)
 Apologies to where ever these images are originally from. Actually, in this case, I don't apologize... a plunger? seriously?
This people... are Tilt-Shift Lenses. (Canon's 24L and 17L)
 Apologies to where ever these images are originally from.
As you can plainly see, they have dials on them. Those are for adjusting the tilt and shift of the lens.
Tilting is when you alter the lens plane, by swinging the lens' axis away from being center and perpendicular to the film plane. Think of it as an Elephant's trunk. If the Elephant was to hold out it's snout perfectly straight - that would be a normal lens. If the elephant bends his snout upwards or downwards, it would be tilting it. Unfortunately, because of limitations imposed by the mechanicals, tilting is only in the up/down axis. (These lenses do allow you to rotate however) With Tilt-Shift lenses, you are given the ability to adjust the tilt by ±6.5°, as much or as little as you want, as well as as fine as you want. Each little tick mark is probably a quarter of a degree. Though, I must add, I'm unsure if this applies to all the TS-e's or just the 17mm.
Shifting is when you move the lens plane laterally to the film plane. Think of it as a sliding door on a Mini-van. When closed, the door is in it's normal alignment. But, if you open the door and slide it open, you are now shifting the door's placement on the Minivan. Since you have the door open on this proverbial minivan, you might as well look through the glass now... Hmmm... strange. Where was I? Oh yeah... Shifting. On Canon lenses, you can get up to ±12mm of shift. Once again, this figure may only apply to the 17mm TS-e.
Now, when you combine the tilting with the shifting, you are given an amazing amount of control over your shot. In Real Estate and Architectural Photography, this control is translated into making buildings look true to life. In other realms, they are used for miniaturization - which, IMHO, Keith Loutit is the king. If you haven't seen any of his videos yet, go watch them after reading my post. Links at the bottom
So, that's Tilt/Shift.
What's the deal with the plunger? The deal is, there are people out there that think taking a lens, gluing it to a plunger, then mounting the plunger to your camera is going to give you the ability to tilt-shift. They are wrong. At best, you get tilting. In reality, you get a really stupid looking lens modification. Worse still, You lose Infinity-focus, which is rather important for doing Tilt/Shift as you're dealing with Scheimpflug there.
In effect, the plunger-mod will get you results somewhat close to what this guy gets you:
 What's that? It's a LENSBABY! (yaaaay!!).
What's a Lensbaby? I dunno, but it's EXTREMELY AWESOME. Lensbaby is made of Creativity, which make your photos grow, which is why you should buy one, because plungers are for Toilets and have you ever seen a picture come out of a toilet? It's got BENDING, super extra bending! and 5 KINDS OF BOKEH*! Which makes your pictures photolicious, unlike other cheap lenses, which are NOT photolicious. Taking pictures with it will make you wonder why you've never had photos that LOOK LIKE EXPLOSIONS!
Woah... I better lay off the Brawndo.
So, as i was trying to say. Lensbabies are an inventive (and properly manufactured) way of doing "Selective Focus". What's selective focus and how does it differ from how lenses normally focus. Selective Focus is when you choose a subject and have the photo so that they are the only thing in focus. How does it differ? Aside from the bending factor, not a whole lot. After all, Focusing is about being selective to begin with, right? So, yeah... I don't have an answer for that second question.
Now... Udi over at diyphotography has come up with an ingenious method of faking the tilt-shift effect. Once again, not really tilt-shift, but closer than the Plunger thing.
Link: http://www.diyphotography.net/create-awesome-tilt-shift-macro-shots-with-old-car-headlights
Now, my suggestion is, if you do his project, use a CPL filter instead of an old filter/stepping ring. Additionally, Udi suggested in his comment section that the lens be mounted off-center. Doing that, and attaching it to a CPL, will allow you to rotate it in whichever direction you want.
Now, combine that with the Plunger idea and you'll probably end up with the craziest DIY lens ever. I can't imagine what the effect will be with the two combined, but I do know that your ability to focus to infinity will be tossed out the window.
-- EDIT--
I have found a DIY T/S that yields closer results than other ideas. Still a plunger, but this one I'm not going to laugh at as much, because Captain Nod put more thought into it. Go Here to check it out. My belief on this one is that he took a few factors into consideration here (like the lack of shifting) and at the bottom, he says he's going to work on a method of controlling the shift as well. The Cavaet here is - his idea is better but it lacks the sharpness of a true T/S but it's still pretty sharp.
Once again, a glorified Lensbaby. ;)
Links!
Lifehacker/Make Magazine Plunger "T/S"
DIYPhotography's Projector Lamp Lens
Foundphotography's Retarded T/S Project
Nikon's PC-E Nikkor 24mm F3.5
Canon's Tilt-Shift Line-up
Lensbaby - Canadian site or If you're American (the website will redirect you depending on which country you're in)
Captain Nod's PlungerCam and in action.
Keith Loutit vids: Bathtub IV, Helpless, Bathtub III, Bathtub II and Beached
* I'm unsure of the Muse and others, but the Lensbaby 2.0 came with several drop in apertures. 2.2, 2.4, 4.0, 5.6, 8.0 and 2 blanks. The creative kit gives you a heart and star, and several more blanks.
This... is NOT a tilt-shift lens. (i'll explain below why)
Apologies to where ever these images are originally from. Actually, in this case, I don't apologize... a plunger? seriously?This people... are Tilt-Shift Lenses. (Canon's 24L and 17L)
Apologies to where ever these images are originally from. As you can plainly see, they have dials on them. Those are for adjusting the tilt and shift of the lens.
Tilting is when you alter the lens plane, by swinging the lens' axis away from being center and perpendicular to the film plane. Think of it as an Elephant's trunk. If the Elephant was to hold out it's snout perfectly straight - that would be a normal lens. If the elephant bends his snout upwards or downwards, it would be tilting it. Unfortunately, because of limitations imposed by the mechanicals, tilting is only in the up/down axis. (These lenses do allow you to rotate however) With Tilt-Shift lenses, you are given the ability to adjust the tilt by ±6.5°, as much or as little as you want, as well as as fine as you want. Each little tick mark is probably a quarter of a degree. Though, I must add, I'm unsure if this applies to all the TS-e's or just the 17mm.
Shifting is when you move the lens plane laterally to the film plane. Think of it as a sliding door on a Mini-van. When closed, the door is in it's normal alignment. But, if you open the door and slide it open, you are now shifting the door's placement on the Minivan. Since you have the door open on this proverbial minivan, you might as well look through the glass now... Hmmm... strange. Where was I? Oh yeah... Shifting. On Canon lenses, you can get up to ±12mm of shift. Once again, this figure may only apply to the 17mm TS-e.
Now, when you combine the tilting with the shifting, you are given an amazing amount of control over your shot. In Real Estate and Architectural Photography, this control is translated into making buildings look true to life. In other realms, they are used for miniaturization - which, IMHO, Keith Loutit is the
So, that's Tilt/Shift.
What's the deal with the plunger? The deal is, there are people out there that think taking a lens, gluing it to a plunger, then mounting the plunger to your camera is going to give you the ability to tilt-shift. They are wrong. At best, you get tilting. In reality, you get a really stupid looking lens modification. Worse still, You lose Infinity-focus, which is rather important for doing Tilt/Shift as you're dealing with Scheimpflug there.
In effect, the plunger-mod will get you results somewhat close to what this guy gets you:
What's that? It's a LENSBABY! (yaaaay!!). What's a Lensbaby? I dunno, but it's EXTREMELY AWESOME. Lensbaby is made of Creativity, which make your photos grow, which is why you should buy one, because plungers are for Toilets and have you ever seen a picture come out of a toilet? It's got BENDING, super extra bending! and 5 KINDS OF BOKEH*! Which makes your pictures photolicious, unlike other cheap lenses, which are NOT photolicious. Taking pictures with it will make you wonder why you've never had photos that LOOK LIKE EXPLOSIONS!
Woah... I better lay off the Brawndo.
So, as i was trying to say. Lensbabies are an inventive (and properly manufactured) way of doing "Selective Focus". What's selective focus and how does it differ from how lenses normally focus. Selective Focus is when you choose a subject and have the photo so that they are the only thing in focus. How does it differ? Aside from the bending factor, not a whole lot. After all, Focusing is about being selective to begin with, right? So, yeah... I don't have an answer for that second question.
Now... Udi over at diyphotography has come up with an ingenious method of faking the tilt-shift effect. Once again, not really tilt-shift, but closer than the Plunger thing.
Link: http://www.diyphotography.net/create-awesome-tilt-shift-macro-shots-with-old-car-headlights
Now, my suggestion is, if you do his project, use a CPL filter instead of an old filter/stepping ring. Additionally, Udi suggested in his comment section that the lens be mounted off-center. Doing that, and attaching it to a CPL, will allow you to rotate it in whichever direction you want.
Now, combine that with the Plunger idea and you'll probably end up with the craziest DIY lens ever. I can't imagine what the effect will be with the two combined, but I do know that your ability to focus to infinity will be tossed out the window.
-- EDIT--
I have found a DIY T/S that yields closer results than other ideas. Still a plunger, but this one I'm not going to laugh at as much, because Captain Nod put more thought into it. Go Here to check it out. My belief on this one is that he took a few factors into consideration here (like the lack of shifting) and at the bottom, he says he's going to work on a method of controlling the shift as well. The Cavaet here is - his idea is better but it lacks the sharpness of a true T/S but it's still pretty sharp.
Once again, a glorified Lensbaby. ;)
Links!
Lifehacker/Make Magazine Plunger "T/S"
DIYPhotography's Projector Lamp Lens
Foundphotography's Retarded T/S Project
Nikon's PC-E Nikkor 24mm F3.5
Canon's Tilt-Shift Line-up
Lensbaby - Canadian site or If you're American (the website will redirect you depending on which country you're in)
Captain Nod's PlungerCam and in action.
Keith Loutit vids: Bathtub IV, Helpless, Bathtub III, Bathtub II and Beached
* I'm unsure of the Muse and others, but the Lensbaby 2.0 came with several drop in apertures. 2.2, 2.4, 4.0, 5.6, 8.0 and 2 blanks. The creative kit gives you a heart and star, and several more blanks.
Thursday, December 10, 2009
Working with Macro Tubes
Something that has come up recently on Fred Miranda.com... Shooting Macro via... extension tubes.
While there are many "macro" (or Micro if you're a Nikon shooter) lenses out there, very few are actually Macro lenses. That is... Lenses capable of shooting at minimum focusing distances of less than a foot or so, and are able to produce images that are 1:1. What is 1:1?
1:1 is where the area you are shooting, equals the size of the image on the sensor or meaning the image on the film is the same size as the object being photographed (wiki).
As far as I'm concerned, there's 2 ways to go about doing Macro. One is getting a macro lens. The other is getting a decent lens and attaching it to extension tubes.
Most of the big manufacturers make a 1:1 lens in some way or another. Canon has their 100mm 2.8 Macro. Sigma produces a 105mm 2.8 Macro. Tamron has a 90mm macro 2.8. Nikon has... something. I dunno. Don't really care. :P
Canon also has a 50mm Macro and a 60mm macro, but I don't know much about them except that the 50mm needs the life size converter to do 1:1, and the 60mm is in the EF-S mount, which I have vowed to stay away from in the future (except unless a 10-22 falls into my lap). There's also the MP-E 65mm, but that's a whole new bag of tricks, as it goes above and beyond 1:1 (it can do 5:1)
While I can't tell you much about those lenses more than I already have, I can tell you that Macro Tubes have their pros and cons. If you go for a true 1:1 lens, you can still use a macro tube and potentially gain better than 1:1.
1) Minimum Focusing Distance (MFD) can drop (heavily) in some lenses, it reduces it so much that you pretty much touch the subject
2) If you buy cheap-o tubes, you have no Aperture confirmation. You'll get 00 on your display. Auto-settings tend not to work well. However, if you go with Kenko or Canon's EF25, you do retain Aperture confirmation, as they have connectors to maintain the camera's ability to talk to the lens.
2a) If you have cheapie tubes that have no aperture confirmation you have to work with your lens while wide open or, you have to attempt enforcing stop-down through a bit of a physically complicated method:
Sharpness sometimes isn't much of a problem with macro tubes if the lens you're using is already razor sharp to begin with. I wrote all of this info once before, and they were asking about using tubes in conjuction with either the 24-70 or 70-300 (both by Canon). As i stated then, it won't be much of a problem with the 24-70 because of how sharp it is, but the 70-300 (assuming it's not the DO or an L) will only yield okay-ish results - post processing will be needed on lower-end lenses.
3) Lighting is extremely important... if you're not out and about in full sun, get yourself a macro ring if you can, otherwise, you'll have to play with off-camera flashing, and that can be frustrating if you're learning macro at the same time. at least... it was for me. *shrugs*
An alternative to macro-ring flashing is off-camera flashing with a diffuser, or if you want to do Macro in a "studio" environment, then build (or buy) yourself a lightbox. I did, and one of these days I'll get around to sharing the method and materials required.
Now, there are two other options that Canon has made available. They are the 250D and 500D filters. They provides a little more magnification to your lens, but at a heavy cost and only come in a limited amount of filter sizes.

Now, understanding how to get true macro, we need to understand what's going on with a macro tube. First and foremost, I have never been able to achieve 1:1, at least, not to my knowledge. I may have incidently and not realized it but that's not the point here. What the point is, trying to understand where you stand with your macro tubes and current stock of lenses. Thanks to Pixel Perfect at FredMiranda.com, I have this nice little formula.
Magnification = extension length divided by lens length or
While there are many "macro" (or Micro if you're a Nikon shooter) lenses out there, very few are actually Macro lenses. That is... Lenses capable of shooting at minimum focusing distances of less than a foot or so, and are able to produce images that are 1:1. What is 1:1?
1:1 is where the area you are shooting, equals the size of the image on the sensor or meaning the image on the film is the same size as the object being photographed (wiki).
As far as I'm concerned, there's 2 ways to go about doing Macro. One is getting a macro lens. The other is getting a decent lens and attaching it to extension tubes.
Most of the big manufacturers make a 1:1 lens in some way or another. Canon has their 100mm 2.8 Macro. Sigma produces a 105mm 2.8 Macro. Tamron has a 90mm macro 2.8. Nikon has... something. I dunno. Don't really care. :P
Canon also has a 50mm Macro and a 60mm macro, but I don't know much about them except that the 50mm needs the life size converter to do 1:1, and the 60mm is in the EF-S mount, which I have vowed to stay away from in the future (except unless a 10-22 falls into my lap). There's also the MP-E 65mm, but that's a whole new bag of tricks, as it goes above and beyond 1:1 (it can do 5:1)
While I can't tell you much about those lenses more than I already have, I can tell you that Macro Tubes have their pros and cons. If you go for a true 1:1 lens, you can still use a macro tube and potentially gain better than 1:1.
1) Minimum Focusing Distance (MFD) can drop (heavily) in some lenses, it reduces it so much that you pretty much touch the subject
2) If you buy cheap-o tubes, you have no Aperture confirmation. You'll get 00 on your display. Auto-settings tend not to work well. However, if you go with Kenko or Canon's EF25, you do retain Aperture confirmation, as they have connectors to maintain the camera's ability to talk to the lens.
2a) If you have cheapie tubes that have no aperture confirmation you have to work with your lens while wide open or, you have to attempt enforcing stop-down through a bit of a physically complicated method:
Step 1 - Put your lens on the bodyAs mentioned, Depth of Field (DOF) decreases as you add tubes, so if you're aiming to get a macro shot with a lot of detail, you need to drop the aperture (F/10-16 works for me). But if you want a small amount of detail to show through, go wide-open.
Step 2 - Choose the F stop you want (keep in mind, DOF is narrower with tubes)
Step 3 - Hold the DOF preview button and remove the lens.
Step 4 - Attach lens to macro tube and then lens+tube to Camera
Sharpness sometimes isn't much of a problem with macro tubes if the lens you're using is already razor sharp to begin with. I wrote all of this info once before, and they were asking about using tubes in conjuction with either the 24-70 or 70-300 (both by Canon). As i stated then, it won't be much of a problem with the 24-70 because of how sharp it is, but the 70-300 (assuming it's not the DO or an L) will only yield okay-ish results - post processing will be needed on lower-end lenses.
3) Lighting is extremely important... if you're not out and about in full sun, get yourself a macro ring if you can, otherwise, you'll have to play with off-camera flashing, and that can be frustrating if you're learning macro at the same time. at least... it was for me. *shrugs*
An alternative to macro-ring flashing is off-camera flashing with a diffuser, or if you want to do Macro in a "studio" environment, then build (or buy) yourself a lightbox. I did, and one of these days I'll get around to sharing the method and materials required.
Now, there are two other options that Canon has made available. They are the 250D and 500D filters. They provides a little more magnification to your lens, but at a heavy cost and only come in a limited amount of filter sizes.

Now, understanding how to get true macro, we need to understand what's going on with a macro tube. First and foremost, I have never been able to achieve 1:1, at least, not to my knowledge. I may have incidently and not realized it but that's not the point here. What the point is, trying to understand where you stand with your macro tubes and current stock of lenses. Thanks to Pixel Perfect at FredMiranda.com, I have this nice little formula.
Magnification = extension length divided by lens length or
m' = e/L
So, if you have an extension of 25mm and a lens of 80mm, your magnification will be 0.3125x.
With 55mm or extension and a 70mm lens, you get 0.78x. Which I'm thinking equals to 1:1.24, meaning that i'm close, but not quite. Remember that MP-E lens i mentioned? It gets up to 5:1 (aka 5x magnification). Because I'm at 1.24, I am shooting stuff that is 1.24x smaller than the full frame. Confused yet? good... because so am I.
-edit- This next part is thanks to Kakomu
The easiest way to figure this out is to photograph a ruler so that you have a measurement of the width of your shot. Compare that to the size of your sensor: Voila, magnification ratio.
For instance. Let's say you have a 50mm lens on 30mm of extension tubes. You point it at a ruler and measure X mm from the left frame to the right. Then, you go to the manufacturer's website, and find that your sensor is Y mm wide. Your Macro ratio is, thus, 1 : (X/Y).
Example: the measurement on the picture is 40mm and the sensor size is 20mm. Thus, the ratio is 1 : (40/20) = 1:2. The object, therefore, is half as large, on the sensor, as it is in real life.
It's also important to note that where the lens is focused makes a big difference. I typically try to focus the lens at Infinity and just move back and forth. I hear all the time that lenses perform best when you focus to infinity compared to the MFD. Then again, the MFD of a lens on a macro tube doesn't seem to make a colossal difference, so I don't even worry about it.
Also, longer lenses on extension tubes can produce some excellent results too. You won't easily get 1:1 macro shots like you would with a 50mm lens or shorter, but you can take pictures of things up close and have greater subject isolation. Flowers and other small objects benefit greatly from this approach, in my opinion.
Sunday, November 15, 2009
REMEMBER IN NOVEMBER
EDITOR'S NOTE: You'll have to forgive the formatting of this post, as BlogSpot's editor was not cooperating with me today. If anyone can suggest a good external editor that i can use to make these posts better, please do. Because Blogspot's editor and Notepad don't seem to be compatible, and this is a source of aggravation for me.
REMEMBER IN NOVEMBER
Popping the Zeiss on, I went out on Remembrance Day for a while. I needed the fresh air and the bright sunlight was providing inspiration, or Vitamin D. Either or. Does it matter?

Suffice to say, the poignant ceremonies were still beautiful, and brought back memories of my days as an Air Cadet. Though, I don't recall ever having such great weather when I was in a Remembrance Day ceremony. My memories were of being in Honour Guard, standing at the unfortunately shaded corner of the cenotaph in Newmarket, on a day that was just above freezing, muttering in my head, asking myself "Why did I volunteer for Honour Guard this time?" I at least, got in the paper... sort of. I was a blur of bokeh in the background of a shot taken of my fellow cadet.


There have been days where I have wondered to myself... Should I go back? Should I become a CI for a local squadron? In this case, the local squadron, just happens to be the one that are in the following pictures: 330 Danforth Tech.
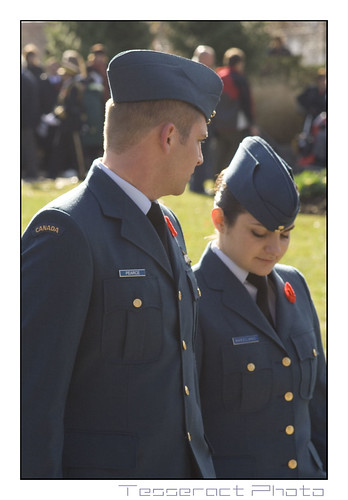
In this picture here, are what I imagine are the co-captains of the squadron. Not sure which was commanding officer, but I have a feeling it was the woman. Supposedly, a memo from above a few years ago decided to do away with the rank of Major in the Air Cadet system. I would venture a guess that thanks to that, there are many squadrons out there now with 2 or more captains. Without the ability to be promoted further, I wonder if some have left the Air Cadet system to further pursue their careers, gunning for that rank of Major.

To those that do, I give nothing but respect. You went in wanting to lead young men and women, and you're setting the example for the next generation.
*salutes* :)
One thing is for sure though... in my Cadet days, we never had cool jackets like those.
We had either our standard tunic, which we wore almost all of the time except in the summer, or the heavy overcoat that was for the winter (still wearing the tunic underneath).
Granted, the overcoat did make marching across the frozen tundra of Base Borden somewhat more bearable, but it was only good for when temps were below freezing.
I only wished that we had something a little more stable for marching in snow with, to go along with the overcoat.

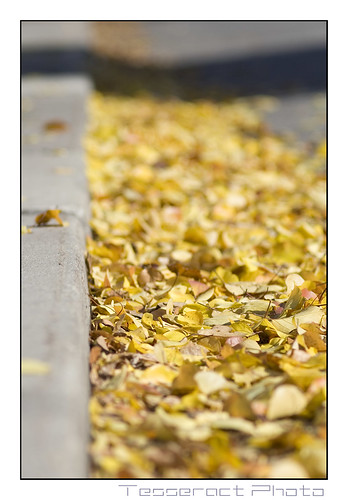
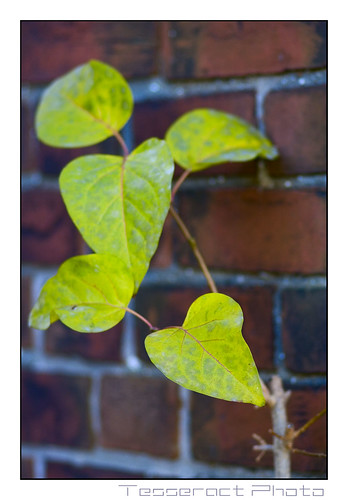
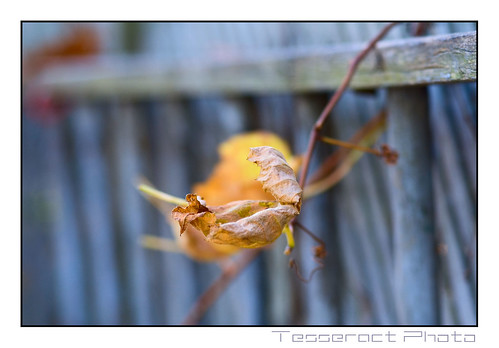
After the Parade ended, I mosied on back to my place and thought, "It's nice a sunny today, I should take advantage of the nice blue sky and strong sunlight". So, as a result I started taking pictures of the trees and leaves along the way back. Honey Locusts provided a nice contrast of yellow to the blue sky. While in other spots, the bright sunlight provided amazing illumination for stuff a little more grounded. Hedges, bushes and fallen leaves all provided excellent fodder for shots.


REMEMBER IN NOVEMBER
Popping the Zeiss on, I went out on Remembrance Day for a while. I needed the fresh air and the bright sunlight was providing inspiration, or Vitamin D. Either or. Does it matter?
Suffice to say, the poignant ceremonies were still beautiful, and brought back memories of my days as an Air Cadet. Though, I don't recall ever having such great weather when I was in a Remembrance Day ceremony. My memories were of being in Honour Guard, standing at the unfortunately shaded corner of the cenotaph in Newmarket, on a day that was just above freezing, muttering in my head, asking myself "Why did I volunteer for Honour Guard this time?" I at least, got in the paper... sort of. I was a blur of bokeh in the background of a shot taken of my fellow cadet.
There have been days where I have wondered to myself... Should I go back? Should I become a CI for a local squadron? In this case, the local squadron, just happens to be the one that are in the following pictures: 330 Danforth Tech.
In this picture here, are what I imagine are the co-captains of the squadron. Not sure which was commanding officer, but I have a feeling it was the woman. Supposedly, a memo from above a few years ago decided to do away with the rank of Major in the Air Cadet system. I would venture a guess that thanks to that, there are many squadrons out there now with 2 or more captains. Without the ability to be promoted further, I wonder if some have left the Air Cadet system to further pursue their careers, gunning for that rank of Major.
To those that do, I give nothing but respect. You went in wanting to lead young men and women, and you're setting the example for the next generation.
*salutes* :)
One thing is for sure though... in my Cadet days, we never had cool jackets like those.
We had either our standard tunic, which we wore almost all of the time except in the summer, or the heavy overcoat that was for the winter (still wearing the tunic underneath).
Granted, the overcoat did make marching across the frozen tundra of Base Borden somewhat more bearable, but it was only good for when temps were below freezing.
I only wished that we had something a little more stable for marching in snow with, to go along with the overcoat.
After the Parade ended, I mosied on back to my place and thought, "It's nice a sunny today, I should take advantage of the nice blue sky and strong sunlight". So, as a result I started taking pictures of the trees and leaves along the way back. Honey Locusts provided a nice contrast of yellow to the blue sky. While in other spots, the bright sunlight provided amazing illumination for stuff a little more grounded. Hedges, bushes and fallen leaves all provided excellent fodder for shots.
Thursday, October 29, 2009
Planet X Tibo
Hardy the venue I want to use for this, but it's not being used, so it's time to sell it.
2006 Planet X Tibo - Like new condition - rarely ridden - extremely minor scratches.
Very smooth feel with great balance.
Hussefelt cranks on FSA platinum BB,
Sun Mammoths w/ LX hubs [72pt engagement!] - single speed via No-railleur [please note, front wheel is not as pictured, that's the wrong wheel]
30'' handlebars, Norco Team Trials fork, CNC Azonic stem, Magura HS-33's (gold levers and archs)
http://i102.photobucket.com/albums/m84/epictro/PX-1.jpg
http://i102.photobucket.com/albums/m84/epictro/px-2.jpg
http://i102.photobucket.com/albums/m84/epictro/px-3.jpg
$900!
If you want to get into Trials, then this is too good of a deal to pass up.
Low Ballers will be ignored as will be scammers
Serious Offers Only - don't waste my time or yours
GOLDEN HORSESHOE AND BUFFALO AREA ONLY
Saturday, October 24, 2009
How to make Facebook better.
First step: Go to your Applications page and start getting rid of all the stupid applications you added and never use. I ended up removing something like 20 this morning alone, and I've done this a few times in the past. Remember! Removing the application, does not remove the content. If you used an application that can be potentially embarrassing, well... too bad for you.
Second Step: Go get greasemonkey
Note: YOU MUST INSTALL GREASEMONKEY FOR ANY OF THESE SCRIPTS TO WORK.
Now... to make Facebook pretty and fun again!
1) If you hate seeing Quizzes and Mafia Wars and other dumb crap like that, and install fb purity.
2) Facebook tends to screw up Firefox on occasion. Get "UnF*** Facebook" [Warning... it's actual name is NOT censored.]
3) Let's make Facebook a little more user friendly, shall we? Install "Facebook Manager Plus"
4) And while we're at it... if you like photos, but hate thumbnails... Install FB Large Photos
5) Let's face it... If you like something, You'll find it on your own, right? Get rid of those stupid sidebar "your friend is a fan of" boxes. "Not A Fan"
6) Since, you don't like that stuff, there's no reason for you to NOT be able to block applications as well right? Click here for a script to add "Block App" to any invites/requests you may get
7) While we're at it... Let's kill ads on facebook too. Remove Facebook Ads or Facebook Ad Killer
8) Let's remove the tedium of accepting stuff, one at a time. MASS ACCEPT. This guy is nice cause it adds checkboxes to all of your requests, allowing you which you'd like to accept.
9) Speaking of accept... Want to change the color of people's names? Well, this will let you have those that aren't friends, show as red instead. Link Color Changer
10) This one, probably sucks, but it's name is awesome: Facebook NewsFeed ShamWow
And lastly... Making Facebook Pretty
Facebook Colour Changer
That about wraps it up. After adding some of those (or even all) scripts, you should have a pretty sweet arrangement on your facebook page. Enjoy!
Monday, October 19, 2009
The Second Passion...
Music, is my second passion. Actually, I really should consider it my first passion as I'm always listening to music. I only look at so many photographs. I guess it's a passive/active matter. I passively listen to music, but actively look at photos. Music can go on, in the background. Photos, demand attention.
Lately, my thing has been seeking out remixes of older tracks. Anything pretty much older than 5years, cause quite frankly, for about 5 years I didn't listen to much new stuff. That was roughly between 2002-2007 - so anything that came out in that period, in my mind is not worthy of classic status. Though, there were certainly many tracks in that time frame that were really good. I will not discount them outright - but they don't qualify for my taste of updated remixes.
Needless to say, I've really been enjoying listening to the following three tracks for reasons that were mentioned in the last paragraph, and for reasons i cannot explain.
Yvan and Dan Daniel - Silence (a remix of the depeche mode track by the same name)
Blur - Song 2 (Micky Slim "yeah to the woo booty" remix)
2 Bit Thugs - Block Rockin Beats (Chemical Brothers original)
IIO - rapture (Starkiller's remix)
Public Domain - Operation Blade (not sure the name of the remix... but it itself is a remix of the Pump Panel reconstruction remix of New Order's "confusion")
Yello - Oh Yeah (Lutzenkirchen remix)
In my mind, I think that if you're gonna get anywhere these days in the music industry as an artist, you need to start somewhere, and you need to start somewhere solid. The classic track is a great place to start. People like classics. They're favourite songs from (whenever). Take a good track from "back in the day" and fix it up, and you're guaranteed to bust out with a hit. When in doubt... default to nintendo music. We all like that stuff but for the love of god, leave Tetris, Zelda and Super Mario alone... they've all been done to death. Do Excitebike instead. Do Ghosts N Goblins. For extra creativeness, use a melody from a sega game instead. use the theme(s) from Wonderboy, Alex Kidd, Out Run, Phantasy Star, etc. Hey! the Theme from Sonic the Hedgehog hasn't been done a while... try that!
Try anything... really. Just don't screw it up, and you're all good. Cause nothing pisses off a music fan more than hearing their favourite song mangled. but more over... no one will want to hear your take more than once, if it ends up sucking. Sorry, that's the way it is.
An apology - I like to link stuff when i see it appropriate, but I wrote this post on my laptop. Linking, when working without a mouse, is a bit of a pain. That's why there's only 2 links this time.
Thursday, October 15, 2009
Yashica YUS vs DSB (vs. MC)
Going through my stats, It appears that many have stumbled upon my blog by virtue of seeking out information on Yashica and Contax lenses. While I can only comment on the 2 that I have, I'm sure the information can be used and extrapolated upon.
Let's revisit the info I was able to find on the YUS.
Source: Yashica.org
Now... that's the info for the YUS version of the 28mm lens. Info on the DSB is more or less the same, except one minor detail. The YUS was North American Market only (hence the name, Yashica US). The DSB was everywhere else. Here's the stickler, while it's not readily apparent, the YUS (in most opinions) is the better version of the 2 lenses. For some unknown reason, or at least a reason that hasn't been documented on the internet, the North American version was given better glass and coatings*. Though, I have also read that this is bunk and they ARE the same. It should be noted that the YUS brand no longer exists, having gone the way of the Dodo or Polaroid Camera. I'd imagine Yashica closed shop in the US some time in the 80s.
Construction-wise, they are virtually identical. Except in the 28mm case, where the DSB is a touch smaller. Nevertheless both are 6-bladed 28mm lenses with MFD's of 35mm and 6 aperture stops with a surprisingly wide angle of view. It throws me off sometimes how wide and shallow this lens can be. I've taken pictures of things were I was 1-2 feet away, only to switch and end up needing to be 3-4 feet away with my 18-55, zoomed to 28mm. I'll have to get to taking an example shot some day...
So, having said that... I did manage to find info on the difference betwen the DSB and ML. I will repost it again. However, this info does not address the issue of MC lenses, I will address that after.
 4.1.  What's the difference between Yashica DSB and Yashica ML lenses?

Yashica DSB lenses are single coated, ML lenses are multi coated (ML
stands for Multi Layer). As usual, a marketing department messed
things thoroughly up by introducing another designator, MC for Multi
Coated, for later multi coated lenses. Contrary to the quality jump
from DSB to ML, there is no distinguishable quality difference between
ML and MC lenses. For quite some time, Yashica offered both DSB and ML
lenses; later on, DSB lenses were sold in package deals with bodies
(like the FX-D Quartz SE and the FX-7).
If that's too small, then i will quickly summarize.
DSB = single coated*
YUS = single coated* (but a better coating than the DSB)
ML = Multi Coated
Basically, if you have the option between DSB and YUS. Take the YUS. If you're choice is between the ML and YUS, take the ML. If money is no object, then why are you even considering an old Yashica lens? :P
So where does MC fit in? MC has nothing to do with coatings. It has to do with lens construction. The C actually stands for Compact; meaning these lenses are smaller than their equivalent ML counterparts. MC lenses also have an interesting feature that means absolutely nothing. The minimum aperture is engraved in green. Interestingly enough, MC lenses can only be used in Av/Ax and not in Tx/Tv... at least, when used on older Yashica bodies. If you're using them with an adapter on a Canon or Nikon, then chances are you're using Manual. This naturally, doesn't address the issue of MM lenses. Those, as far as i can tell are Multi-Mode and are more or less useless to anyone not using a Yashica body (100-series).
ADVICE/RECOMMENDATION:
When buying an adapter, make sure you get the right one. Further to this, spend the extra few dollars and get either a Happypagehk or Big_IS adapter. The difference between their stuff and the other guys is AF-confirming, which means the difference between shooting and ERR 99.
Also, they make adapters that can be adjusted for your largest aperture. My Yashica is a 2.8, but the adapter confirms 2.0. This is somewhat annoying. The Zeiss i have confirms 2.8 (which it is).
Let's revisit the info I was able to find on the YUS.
| Focal length | : | 28mm | | Nearest focus | : | 35cm |
| Aperture blades | : | 6 | | Aperture stops | : | 2.8 - 4.0 - 5.6 - 8.0 - 11 - 16 |
| Length/diameter | : | | Weight | : | 260g | |
| Lenses/groups | : | | Filter diameter | : | 55mm | |
| : | | Max. magnification | : | |||
| Remarks | : | |||||
Now... that's the info for the YUS version of the 28mm lens. Info on the DSB is more or less the same, except one minor detail. The YUS was North American Market only (hence the name, Yashica US). The DSB was everywhere else. Here's the stickler, while it's not readily apparent, the YUS (in most opinions) is the better version of the 2 lenses. For some unknown reason, or at least a reason that hasn't been documented on the internet, the North American version was given better glass and coatings*. Though, I have also read that this is bunk and they ARE the same. It should be noted that the YUS brand no longer exists, having gone the way of the Dodo or Polaroid Camera. I'd imagine Yashica closed shop in the US some time in the 80s.
Construction-wise, they are virtually identical. Except in the 28mm case, where the DSB is a touch smaller. Nevertheless both are 6-bladed 28mm lenses with MFD's of 35mm and 6 aperture stops with a surprisingly wide angle of view. It throws me off sometimes how wide and shallow this lens can be. I've taken pictures of things were I was 1-2 feet away, only to switch and end up needing to be 3-4 feet away with my 18-55, zoomed to 28mm. I'll have to get to taking an example shot some day...
So, having said that... I did manage to find info on the difference betwen the DSB and ML. I will repost it again. However, this info does not address the issue of MC lenses, I will address that after.
4.1. What's the difference between Yashica DSB and Yashica ML lenses?
Yashica DSB lenses are single coated, ML lenses are multi coated (ML stands for Multi Layer). As usual, a marketing department messed things thoroughly up by introducing another designator, MC for Multi Coated, for later multi coated lenses. Contrary to the quality jump from DSB to ML, there is no distinguishable quality difference between ML and MC lenses. For quite some time, Yashica offered both DSB and ML lenses; later on, DSB lenses were sold in package deals with bodies (like the FX-D Quartz SE and the FX-7).
If that's too small, then i will quickly summarize.
DSB = single coated*
YUS = single coated* (but a better coating than the DSB)
ML = Multi Coated
Basically, if you have the option between DSB and YUS. Take the YUS. If you're choice is between the ML and YUS, take the ML. If money is no object, then why are you even considering an old Yashica lens? :P
So where does MC fit in? MC has nothing to do with coatings. It has to do with lens construction. The C actually stands for Compact; meaning these lenses are smaller than their equivalent ML counterparts. MC lenses also have an interesting feature that means absolutely nothing. The minimum aperture is engraved in green. Interestingly enough, MC lenses can only be used in Av/Ax and not in Tx/Tv... at least, when used on older Yashica bodies. If you're using them with an adapter on a Canon or Nikon, then chances are you're using Manual. This naturally, doesn't address the issue of MM lenses. Those, as far as i can tell are Multi-Mode and are more or less useless to anyone not using a Yashica body (100-series).
ADVICE/RECOMMENDATION:
When buying an adapter, make sure you get the right one. Further to this, spend the extra few dollars and get either a Happypagehk or Big_IS adapter. The difference between their stuff and the other guys is AF-confirming, which means the difference between shooting and ERR 99.
Also, they make adapters that can be adjusted for your largest aperture. My Yashica is a 2.8, but the adapter confirms 2.0. This is somewhat annoying. The Zeiss i have confirms 2.8 (which it is).
Wednesday, October 14, 2009
Self-Portraiture
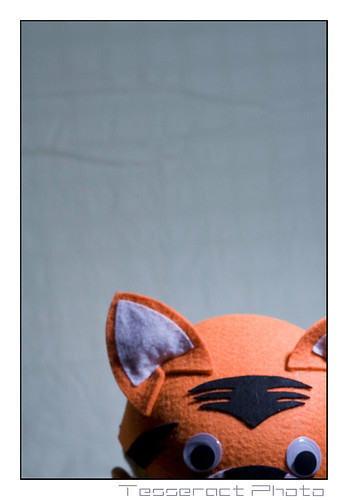
Feeling creative, yet bored, I decided that I needed to try my hand at self portraiture. The following are a few of the results. All in all, in 2 sessions, I probably took about 100+ photos. The bulk were from yesterday, with today's numbering a total of 25+. Out of all of them, none from yesterday were worth a damn except the cat head.
The pics from today were a little more technical in approach, with me setting up my camera and measuring out my minimum focusing distance (MFD), and angling my flash and flood for best lighting. It wasn't until I did all of that, that i realized that I would never be able to get results I like without a stand-in. As a result, I used my flash tripod and got my focussing... bang on!
Camera: Canon Rebel XT
Lens: Contax Zeiss 135mm 2.8
Fstop = 8 Shutter = 100
Flash = Nikon SB24
Other equipment: Cactus Trigger
Lastolite 45'' reflector
Ikea flex lamp w/ 13w fluorescent
Sateen Flat Sheet from Target... 250 thread count. :P
Adobe Photoshop CS3 with TLR Sharpening
In a weird way, without really trying to, I got a annie-leibowitz/vanity fair type vibe in a few shots. Only 1 was grayscaled, and only so i could make my eye color stand out a little.

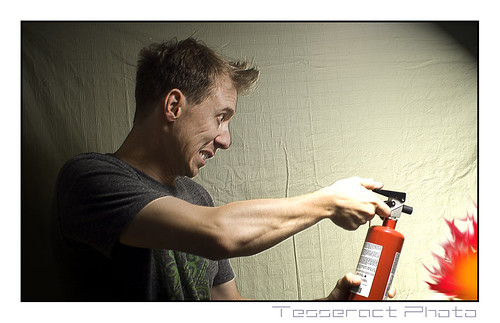
After firing a few test shots, I began to use a few props. A Lightbulb, Daha's "straw", my fire extinguisher, a can of lysol... Random things not usually seen in photo shoots... at least, I've never seen them used in a photo shoot. I also changed shirts for different effect and set-up. To see the rest of the pics, you'll have to go to Facebook or Flickr.
The only way I could have possibly improved on these shots is if I opted to slow down the shutter to allow a little blur, to bring out the magic that the Zeiss lens is so good at making.

Of course, I could not, not take a picture with a lightbulb. After all... the whole idea was a bright idea.

At one point, I was trying shots with the raybans on, and thought of the CSI one-liner meme picture and thought... what the hell, let's do one with that too.

YYYYYEEEEEEEEEEEEEEEEEEEAAAAAAAAAAAAAAHHHHHHHHHHHHHHHHHH
Please note: the skyline photo is not mine. I googled for an image and photoshopped it accordingly.
The pics from today were a little more technical in approach, with me setting up my camera and measuring out my minimum focusing distance (MFD), and angling my flash and flood for best lighting. It wasn't until I did all of that, that i realized that I would never be able to get results I like without a stand-in. As a result, I used my flash tripod and got my focussing... bang on!
Camera: Canon Rebel XT
Lens: Contax Zeiss 135mm 2.8
Fstop = 8 Shutter = 100
Flash = Nikon SB24
Other equipment: Cactus Trigger
Lastolite 45'' reflector
Ikea flex lamp w/ 13w fluorescent
Sateen Flat Sheet from Target... 250 thread count. :P
Adobe Photoshop CS3 with TLR Sharpening
In a weird way, without really trying to, I got a annie-leibowitz/vanity fair type vibe in a few shots. Only 1 was grayscaled, and only so i could make my eye color stand out a little.
After firing a few test shots, I began to use a few props. A Lightbulb, Daha's "straw", my fire extinguisher, a can of lysol... Random things not usually seen in photo shoots... at least, I've never seen them used in a photo shoot. I also changed shirts for different effect and set-up. To see the rest of the pics, you'll have to go to Facebook or Flickr.
The only way I could have possibly improved on these shots is if I opted to slow down the shutter to allow a little blur, to bring out the magic that the Zeiss lens is so good at making.
Of course, I could not, not take a picture with a lightbulb. After all... the whole idea was a bright idea.
At one point, I was trying shots with the raybans on, and thought of the CSI one-liner meme picture and thought... what the hell, let's do one with that too.

YYYYYEEEEEEEEEEEEEEEEEEEAAAAAAAAAAAAAAHHHHHHHHHHHHHHHHHH
Please note: the skyline photo is not mine. I googled for an image and photoshopped it accordingly.
Feeling creative, yet bored, I decided that I needed to try my hand at self portraiture. The following are a few of the results. All in all, in 2 sessions, I probably took about 100+ photos. The bulk were from yesterday, with today's numbering a total of 25+. Out of all of them, none from yesterday were worth a damn except the cat head.

The pics from today were a little more technical in approach, with me setting up my camera and measuring out my minimum focusing distance (MFD), and angling my flash and flood for best lighting. It wasn't until I did all of that, that i realized that I would never be able to get results I like without a stand-in. As a result, I used my flash tripod and got my focussing... bang on!

After firing a few test shots, I began to use a few props. A Lightbulb, Daha's "straw", my fire extinguisher, a can of lysol... Random things not usually seen in photo shoots... at least, I've never seen them used in a photo shoot. I also changed shirts for different effect and set-up. To see the rest of the pics, you'll have to go to Facebook or Flickr.

The only way I could have possibly improved on these shots is if I opted to slow down the shutter to allow a little blur, to bring out the magic that the Zeiss lens is so good at making.

At one point, I was trying shots with the raybans on, and thought of the CSI one-liner meme picture and thought... what the hell, let's do one with that too.

YYYYYEEEEEEEEEEEEEEEEEEEAAAAAAAAAAAAAAHHHHHHHHHHHHHHHHHH
The pics from today were a little more technical in approach, with me setting up my camera and measuring out my minimum focusing distance (MFD), and angling my flash and flood for best lighting. It wasn't until I did all of that, that i realized that I would never be able to get results I like without a stand-in. As a result, I used my flash tripod and got my focussing... bang on!
After firing a few test shots, I began to use a few props. A Lightbulb, Daha's "straw", my fire extinguisher, a can of lysol... Random things not usually seen in photo shoots... at least, I've never seen them used in a photo shoot. I also changed shirts for different effect and set-up. To see the rest of the pics, you'll have to go to Facebook or Flickr.
The only way I could have possibly improved on these shots is if I opted to slow down the shutter to allow a little blur, to bring out the magic that the Zeiss lens is so good at making.
At one point, I was trying shots with the raybans on, and thought of the CSI one-liner meme picture and thought... what the hell, let's do one with that too.
YYYYYEEEEEEEEEEEEEEEEEEEAAAAAAAAAAAAAAHHHHHHHHHHHHHHHHHH
Tuesday, October 6, 2009
Herding Kittens... or taking pictures of them
Hi again... It's me.
So, the other weekend I was introduced to a lovely little storm-cloud coloured kitten by the name of Myla. Myla belongs to Steve and Sarah, good friends from Brampton. They got Myla a few weeks ago, after suffering the loss of another kitty: Rocky. Rocky was a birthday present (so to speak) for Sarah last year. He was a handsome little fellow, Maine Coon-ish in appearance. Unfortunately, he succumbed to health problems. More unfortunate was that i never got to meet him, and more importantly, take a few pictures of him. However, my unofficial photographic mentor did get a few beautiful shots of him.
So... enter Myla.
Myla, everything a kitten is like, is a curious and energetic little thing. Taking photos of her was a bit challenging, given that I usually have problems with flash-lighting at Steve and Sarah's. Not sure why i do... when i figure it out, I'll write about it.
Nonetheless, I did manage to fire off one really good picture of her, though it is a bit on the soft (fuzzy) side. This is due to my working with a relatively unfamiliar lens: the Contax Zeiss mentioned in the previous entry. Nonetheless, I know my abilities when it comes to taking photos of cats, and Myla is the newest entry in the challenge bin. The other entry, is Queen Beatrice - a cat that I haven't been able to take photos of, on account of her preference for where she likes to sleep. Awkwardly in corners and in other small, dark areas.
Myla is only 3-4 months old at this point. I can see her maturing into a gorgeous little kitty. Here's hoping that I can take more, great photos of her. And believe me when i say it... getting a Kitten to pose like this, is not easy. At least, not when you're using a manual focus lens, and trying to get their attention with a dangly-toy-on-a-stick.

D'aaaawwwwwww....
So, the other weekend I was introduced to a lovely little storm-cloud coloured kitten by the name of Myla. Myla belongs to Steve and Sarah, good friends from Brampton. They got Myla a few weeks ago, after suffering the loss of another kitty: Rocky. Rocky was a birthday present (so to speak) for Sarah last year. He was a handsome little fellow, Maine Coon-ish in appearance. Unfortunately, he succumbed to health problems. More unfortunate was that i never got to meet him, and more importantly, take a few pictures of him. However, my unofficial photographic mentor did get a few beautiful shots of him.
So... enter Myla.
Myla, everything a kitten is like, is a curious and energetic little thing. Taking photos of her was a bit challenging, given that I usually have problems with flash-lighting at Steve and Sarah's. Not sure why i do... when i figure it out, I'll write about it.
Nonetheless, I did manage to fire off one really good picture of her, though it is a bit on the soft (fuzzy) side. This is due to my working with a relatively unfamiliar lens: the Contax Zeiss mentioned in the previous entry. Nonetheless, I know my abilities when it comes to taking photos of cats, and Myla is the newest entry in the challenge bin. The other entry, is Queen Beatrice - a cat that I haven't been able to take photos of, on account of her preference for where she likes to sleep. Awkwardly in corners and in other small, dark areas.
Myla is only 3-4 months old at this point. I can see her maturing into a gorgeous little kitty. Here's hoping that I can take more, great photos of her. And believe me when i say it... getting a Kitten to pose like this, is not easy. At least, not when you're using a manual focus lens, and trying to get their attention with a dangly-toy-on-a-stick.
D'aaaawwwwwww....
Tuesday, September 15, 2009
Contax Zeiss 135mm F2.8
Contax Zeiss 135 F2.8

This little guy (a euphemism, i assure you) has found his way into my life. While I have only done one test shot with this beautiful (and rather heavy) lens, it managed to do something that I was unaware of being possible. It made the top of my fridge (which is home to various cooking/baking things) look amazing. Seriously. No colour correction... pure AWB and BAM! A box of Saran Wrap and a steel mixing bowl looks like artwork.
I have to say though... this little gift imparted on me on the weekend was totally unexpected. I had talked to my friend Scott about the Leitz Elmarit R 135 that I was spying on Ebay. We had discusses how the 135mm length has seemingly produced many great lenses through out the years. Leica, Zeiss, Takumar, Canon, Nikkor, Pentacon...etc... etc... Many have compared them over the years, and because beauty is in the eye of the beholder, the results of those comparisons has been usually suspect and left mostly to personal impression and influence.
What makes this Lens so great? Well... if you clicked that last link, you'd know. If you didn't... well... The reason that makes this lens so great is how it renders out-of-focus (oof) blur. It's the blur and Bokeh (amount and shape of blur, imparted by the lens' iris/aperture) that makes it awesome. The bokeh is more often than not, pleasing with this lens. More spectacular is that it renders really nice Bokeh through a good range of its F-stops (which start at 2.8 and end at 22).
Supposedly, this particular lens, while marked with the usual F-stop range, supposedly can do 1/2 stops in between those marked F-stops. That means, instead of doing 2.8 and then having 4.0 next, you can have something in the approximate range of F/3.2 (i think... it might be 3.4 or 3.5 - i dunno.)
Outside of the amazing bokeh/blur, the lens has a nice large grip and decently layed out markings on the barrel. It has a built-in hood and the standard threading for what appears to be 55mm filters. All in all... it's a definite throw-back in feel and what not. Reminds you of when Men were Men, Women were Women and Decent Focal Lengths demanded respect.
The downsides to this fantastic lens...
1) It's heavy
2) It's not a native EOS mount - I know these adapters are supposed to preserve Infinity focus, but I am still skeptical in that realm.
3) 135mm on a crop body (Rebel series) becomes an effective 216mm (thanks to the 1.6x). I don't really buy that whole magnification nonsense, but it does seem to be somewhat true. In other words, what should be a great portrait lens, is not.
Suffice to say... I'm looking forward to playing with this lens. I'll revisit this topic when i have some examples to show off.
:)
Tuesday, September 8, 2009
Inept...
You know... this whole blogging thing is supposed to be real easy, right?
Well... It's apparently not so. At least, for me, it is not. I can't be bothered to do regular updates.
Hell, I can't even get my act together to keep my apartment clean longer than 2 days. I'm gonna remedy that though, by sticking myself with a schedule. I can't decide if i want to make it every 1st and 15th or Every 2nd wednesday. The former should be easier to keep track of. But, every 2nd wednesday would mean that i'd have my gear together for the weekends, and increase the potential of having a clean place for when my girlfriend spends the weekend here.
In other realms... Since my last update I've acquired a Canon 70-200 F4L and a Yashica YUS 28mm 2.8. Both are fantastic lenses, to say the least. The 70-200 gives me what has been out of my reach for far too long... TELEPHOTO!
The 28mm Yashica was an experimentation (albeit a totally unintentional one) with the world of Manual Focus. The Yashica is as old as I am. Or maybe not. I don't know because info on it is scarce. What i do know is this...
Source: Yashica.org
Another source has this to say...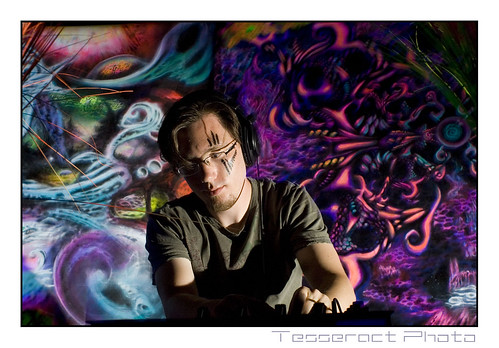
As you can see, the DJ in this picture is quite sharp and the backdrop is slightly blurry, giving the lens a nice quality. I haven't used it in a way that would reveal its bokeh better, yet... but i will eventually.
As for the 70-200 F4L... there's plenty of stuff on Flickr demo'ing that guy. I don't have much to say that pics taken with it, posted on Flickr can't show. Anyhow... so concludes yet another sporadic posting by yours truly. See you in another month and half. :P
Well... It's apparently not so. At least, for me, it is not. I can't be bothered to do regular updates.
Hell, I can't even get my act together to keep my apartment clean longer than 2 days. I'm gonna remedy that though, by sticking myself with a schedule. I can't decide if i want to make it every 1st and 15th or Every 2nd wednesday. The former should be easier to keep track of. But, every 2nd wednesday would mean that i'd have my gear together for the weekends, and increase the potential of having a clean place for when my girlfriend spends the weekend here.
In other realms... Since my last update I've acquired a Canon 70-200 F4L and a Yashica YUS 28mm 2.8. Both are fantastic lenses, to say the least. The 70-200 gives me what has been out of my reach for far too long... TELEPHOTO!
The 28mm Yashica was an experimentation (albeit a totally unintentional one) with the world of Manual Focus. The Yashica is as old as I am. Or maybe not. I don't know because info on it is scarce. What i do know is this...
| Focal length | : | 28mm | | Nearest focus | : | 35cm |
| Aperture blades | : | 6 | | Aperture stops | : | 2.8 - 4.0 - 5.6 - 8.0 - 11 - 16 |
| Length/diameter | : | | Weight | : | 260g | |
| Lenses/groups | : | | Filter diameter | : | 55mm | |
| Angle of view | : | | Max. magnification | : | ||
| Remarks | : | |||||
Another source has this to say...
4.1. What's the difference between Yashica DSB and Yashica ML lenses?
Yashica DSB lenses are single coated, ML lenses are multi coated (ML
stands for Multi Layer). As usual, a marketing department messed
things thoroughly up by introducing another designator, MC for Multi
Coated, for later multi coated lenses. Contrary to the quality jump
from DSB to ML, there is no distinguishable quality difference between
ML and MC lenses. For quite some time, Yashica offered both DSB and ML
lenses; later on, DSB lenses were sold in package deals with bodies
(like the FX-D Quartz SE and the FX-7).
That not withstanding, with a little off-camera flashing, I've obtained a few amazing shots with it. I can't say that I'm overly pleased with outside of that application, but then again I haven't shot much with it. So, I'm really at a disadvantage. Some non-chalante comments have put this at a fantastically sharp lens, particularly when considering its cost (second hand) which averages around $20CDN Here's an off-camera flash example taken approx a month ago. [Wow... I've just realized that I haven't really shot much in the last month.] As you can see, the DJ in this picture is quite sharp and the backdrop is slightly blurry, giving the lens a nice quality. I haven't used it in a way that would reveal its bokeh better, yet... but i will eventually.
As for the 70-200 F4L... there's plenty of stuff on Flickr demo'ing that guy. I don't have much to say that pics taken with it, posted on Flickr can't show. Anyhow... so concludes yet another sporadic posting by yours truly. See you in another month and half. :P
Tuesday, July 21, 2009
Updating...
I'll admit right away that i'm not the best at updating this. But, truth be told, i haven't really engaged in anything that should be considered worthy of updating here.
Needless to say, I'll be going somewhere fantastic this upcoming weekend, and the update after will be awe-inspiring to say the least. :)
Needless to say, I'll be going somewhere fantastic this upcoming weekend, and the update after will be awe-inspiring to say the least. :)
Tuesday, July 7, 2009
Cherry Beach Redux... [Canada Day actually]
 It seems that I tend to not go to Cherry Beach as much as I should, or want to. I'm usually on the go, and my go is not going to Cherry Beach. There's a few dozen reasons why, but I'm not going to write about them. [Although, one being that the ****ing parking bastards ticket cars for retarded reasons]
I tend not to go because, well... I usually have other things to go to.
Having said that, on Canada Day, I had to work. So, what's a good way to end a day of holiday work? Go to Cherry beach!
The promise boys were on hand, as they always are, for Canada Day celebrating. They had all of their regulars hit the decks to pound out great music for a few hours.
Over by the way side, the burners lit up and gave a fireworks show of a different sort. It was here that i learned a magical combination... small aperture, bulb mode and off-camera flashing. Said combo is what resulted in the pictures here.

The reason for this, is one that is long and difficult to explain, but needless to say, I'm loving the results that it has yielded me. All i have to do at this point now, is remember my personal Sunny-16 rule for doing these kinds of shots. If you're thinking I'm gonna post my EXIF's or other numbers, you're sadly mistaken... My pics... My skills... My secrets. :P
Some of the burners that were present for the night were Mo Bot, Sadie Spins, Platypus Mags, ScottG, Ian Injurious, Robin Spunkbucket and Anakin... Naturally, these are not their real names, because they are performers. Stagenames rule.
Actually... truth be told. I'm gonna wrap this one up now because I haven't much to say right now. Enjoy the pics.
If you'd like to see more, well... too bad. I ain't posting more.
(psst... they're on Facebook)


I'm going to end this off with a photography tip. When trying something new that compromises the safety of your camera and your personal well being... have an assistant help you with said project. I stupidly climbed a tree to take the last pic, and I don't think I will be trying that again without help. Safety first kids!
Thursday, June 11, 2009
Cosplay/Anime North, UNITE! in Buffalo, Luminato, TTC, Goat Cheese and other stuff...
Let's start off, shall we?
Well, I guess I should do this in a chronological order, if only to make some resemblance of sense.
---------------------------------------
-- Anime North/Cosplayers/Otakubaloo --
---------------------------------------
On the Saturday of the long weekend, I made my way across town to hit up the Photo Show. As that ended at 7, I headed over to the Toronto Congress Centre to take photos of the Anime-loving kiddies. To say the least, I was quite impressed with some of the outfits. I know I'm going to draw a little ire by saying the following but... Dressing as characters from Naruto [or Dragonball Z for that matter] is pretty lame. I mean seriously lame. No effort, as far as i could see, from a creativity standpoint, was put into any Naruto costume that I saw at Otakubaloo. I'm sure there was a few kids fully decked out in home-made Naruto costumes, but the greater deal of kids that i did see, were wearing crap they probably bought off Ebay.
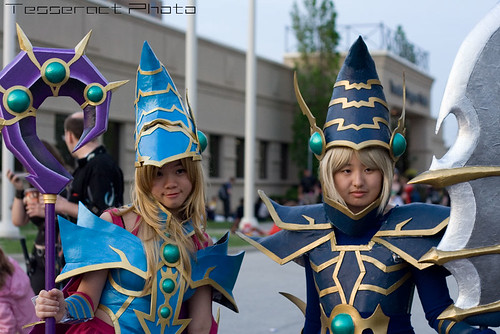
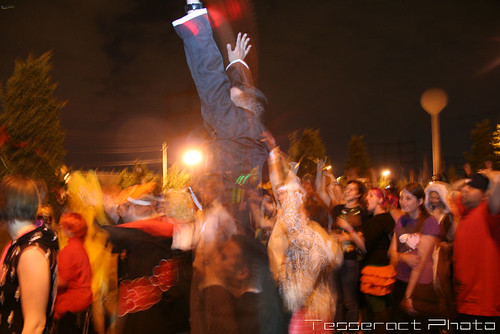
Speaking of Buffalo... Let's jump forward a week.
------------
-- Unite! --
------------
Unite! promised to be a great alternative for those less fortunate in the ownership of the cottage type. What it delivered was a bit of a Gong show, with a heavy side of mismanagement. Several clubs went the night practically empty, while others were rammed. Set times were posted only in one location and many of the big acts overlapped each other. So, if you wanted to hear Monk from Rabbit in the Moon, and then Mark Oliver or Skynet... you were SOL.All three played at roughly the same time. The little info booth set up by the organizers wasn't exactly helpful either, as the people manning it were totally clueless.

One particular club, which will remain unnamed here, must have fed its Bouncers some shitfries with extra dicksauce, because they weren't exactly up-to-speed with the whole economy thing happening on this particular night. I barely got into that bar after pointing out that their headlining DJ was a Trance/Techno dj. He begrudgingly let me in, but barred my friend from entering, giving him the same BS excuse. Sorry dude, but you fail at bouncing. When the club is at 1/4 capacity on Sunday night at 1am, for a "festival" LET EVERYONE YOU CAN IN! The Bartender's aren't going to make tips and the club isn't going to make money by not serving drinks. As a result, I had 1 beer, and that club lost a minimum of 3 other sales. By my best math, that's at least $30-40 lost right from the get-go. Probably more towards $100 the way most of us tend to drink...
If they do this again next year, I hope they do a better job because that was just plain awful.
---------------
-- The Break --
---------------
The weekend of following Unite was an off-weekend for me, as I had issues that needed addressing with my Camera. So, i was without a camera for about 2 weeks while it was sent off to Canon for servicing. So we now fast forward to after i got my camera back, which was about 1.5 weeks ago. Receiving my camera before work, I decided to head out on my lunch and test it a little.
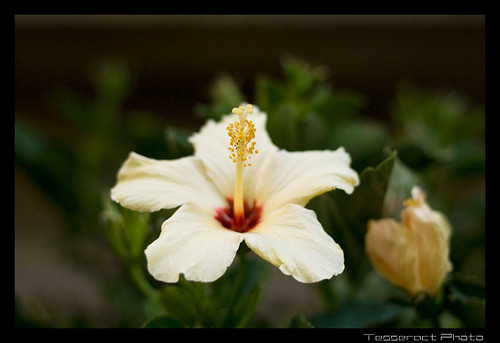
As you can see, the picture is quite clear and crisp. My focussing does leave much to be desired, but i'm still a relative newcomer to producing crisp photos.
-------------------------------------------------------------
-- TORONTO TRANSIT COMMISSION - GREENWOOD MAINTENANCE YARD --
------------------------------------------------------------- Approximately a week ago... say June 3-4ish. I felt like taking a different route home from work. I happened to end up on Jones Avenue, and after being tired of climbing that damn hill, I turned on to a sidestreet and zig-zagged my way home. It was on Chatham street that I saw something that caught my eye and bewildered me... The Greenwood Subway yard.
After passing this, I knew I had to go back and take a photo. So i did. The sheer amount of light pollution in the yard is overwhelming. How overwhelming? I was able to catch the picture above using F/8 @ 1/25th of a second on ISO800. Yes, you read that right. Not quite a Sunny/16, but suffice to say, the light was enough that I was able to stop down to F/8 and use a quarter second shutter.Granted... this was on 800ISO, but still... That's a LOT of light. And if you'll notice, there isn't a soul walking about on the yard. Nope... it was a complete ghost-town. A well-luminated ghost-town, but one nonetheless. This begs the question... why was the yard lit up so much? Don't Subways have headlights? Don't they operate in the dark underground? So... why is the whole area lit up like a football stadium??
------------------------------
-- LUMINATO --
------------------------------
I haven't seen much yet this year for Luminato. Truth be told... With this weekend being the end of it, and me not being in Toronto for it... I doubt i will see more.

So what have i seen? The Luminato Cube and some of the Red Ball Project. The former is a large 20x20 cube set up in Sam Pollock square with different pieces of artwork [i use that term loosely here] for each day. The latter is a more interesting display of large red balls placed randomly through the city. Longwave is what i have photographed above. If you're wondering about the weird blurriness, that's from a special lens I use. If you haven't gotten out to see any of Luminato, do so soon. It's ending THIS SUNDAY.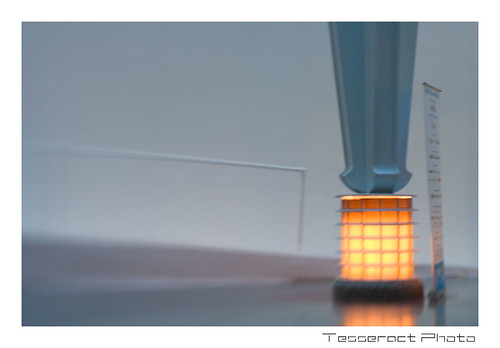
A lamp post/beam in Sam Pollock Square, next to the Luminato Cube...

Life at 8:00 PM EDT at the corner of King and Bay
Dear lord...it's 2:30 am.... I need to get to sleep. Enough writing.
Well, I guess I should do this in a chronological order, if only to make some resemblance of sense.
-- Anime North/Cosplayers/Otakubaloo --
---------------------------------------
Speaking of Buffalo... Let's jump forward a week.
-- Unite! --
------------
One particular club, which will remain unnamed here, must have fed its Bouncers some shitfries with extra dicksauce, because they weren't exactly up-to-speed with the whole economy thing happening on this particular night. I barely got into that bar after pointing out that their headlining DJ was a Trance/Techno dj. He begrudgingly let me in, but barred my friend from entering, giving him the same BS excuse. Sorry dude, but you fail at bouncing. When the club is at 1/4 capacity on Sunday night at 1am, for a "festival" LET EVERYONE YOU CAN IN! The Bartender's aren't going to make tips and the club isn't going to make money by not serving drinks. As a result, I had 1 beer, and that club lost a minimum of 3 other sales. By my best math, that's at least $30-40 lost right from the get-go. Probably more towards $100 the way most of us tend to drink...
If they do this again next year, I hope they do a better job because that was just plain awful.
-- The Break --
---------------
As you can see, the picture is quite clear and crisp. My focussing does leave much to be desired, but i'm still a relative newcomer to producing crisp photos.
-- TORONTO TRANSIT COMMISSION - GREENWOOD MAINTENANCE YARD --
-------------------------------------------------------------
After passing this, I knew I had to go back and take a photo. So i did. The sheer amount of light pollution in the yard is overwhelming. How overwhelming? I was able to catch the picture above using F/8 @ 1/25th of a second on ISO800. Yes, you read that right. Not quite a Sunny/16, but suffice to say, the light was enough that I was able to stop down to F/8 and use a quarter second shutter.Granted... this was on 800ISO, but still... That's a LOT of light. And if you'll notice, there isn't a soul walking about on the yard. Nope... it was a complete ghost-town. A well-luminated ghost-town, but one nonetheless. This begs the question... why was the yard lit up so much? Don't Subways have headlights? Don't they operate in the dark underground? So... why is the whole area lit up like a football stadium??
-- LUMINATO --
------------------------------
I haven't seen much yet this year for Luminato. Truth be told... With this weekend being the end of it, and me not being in Toronto for it... I doubt i will see more.
So what have i seen? The Luminato Cube and some of the Red Ball Project. The former is a large 20x20 cube set up in Sam Pollock square with different pieces of artwork [i use that term loosely here] for each day. The latter is a more interesting display of large red balls placed randomly through the city. Longwave is what i have photographed above. If you're wondering about the weird blurriness, that's from a special lens I use. If you haven't gotten out to see any of Luminato, do so soon. It's ending THIS SUNDAY.
A lamp post/beam in Sam Pollock Square, next to the Luminato Cube...
Life at 8:00 PM EDT at the corner of King and Bay
Dear lord...it's 2:30 am.... I need to get to sleep. Enough writing.
Subscribe to:
Posts (Atom)


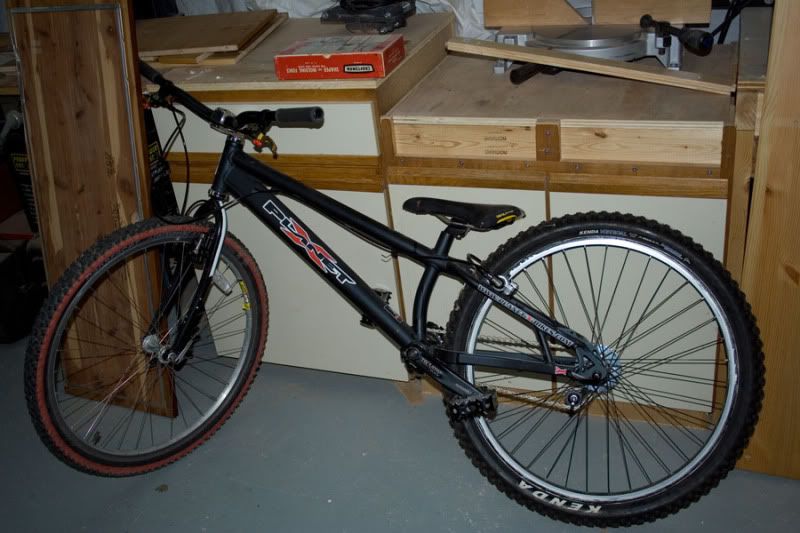
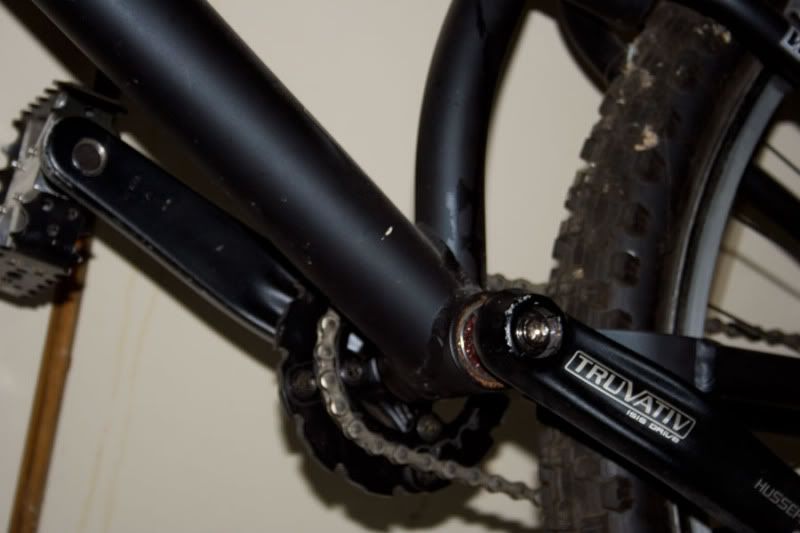
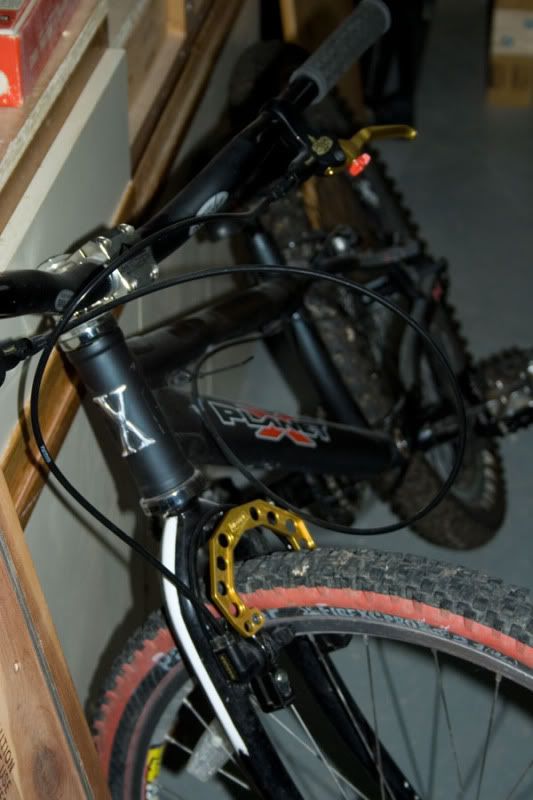